🇺🇸 You want to learn how to make a book sleeve? No problem, you’re in the right place! Welcome to the tutorial for a basic book sleeve. Book sleeves are also a great beginner’s project, so don’t be afraid if you have very little sewing experience.
🇩🇪 Du möchtest lernen, wie man eine Buchhülle näht? Kein Problem; da bist du genau am richtigen Ort! Willkommen zum Tutorial. Buchhüllen, insbesondere in dieser einfachen Version, sind übrigens ein super Projekt für Anfänger.

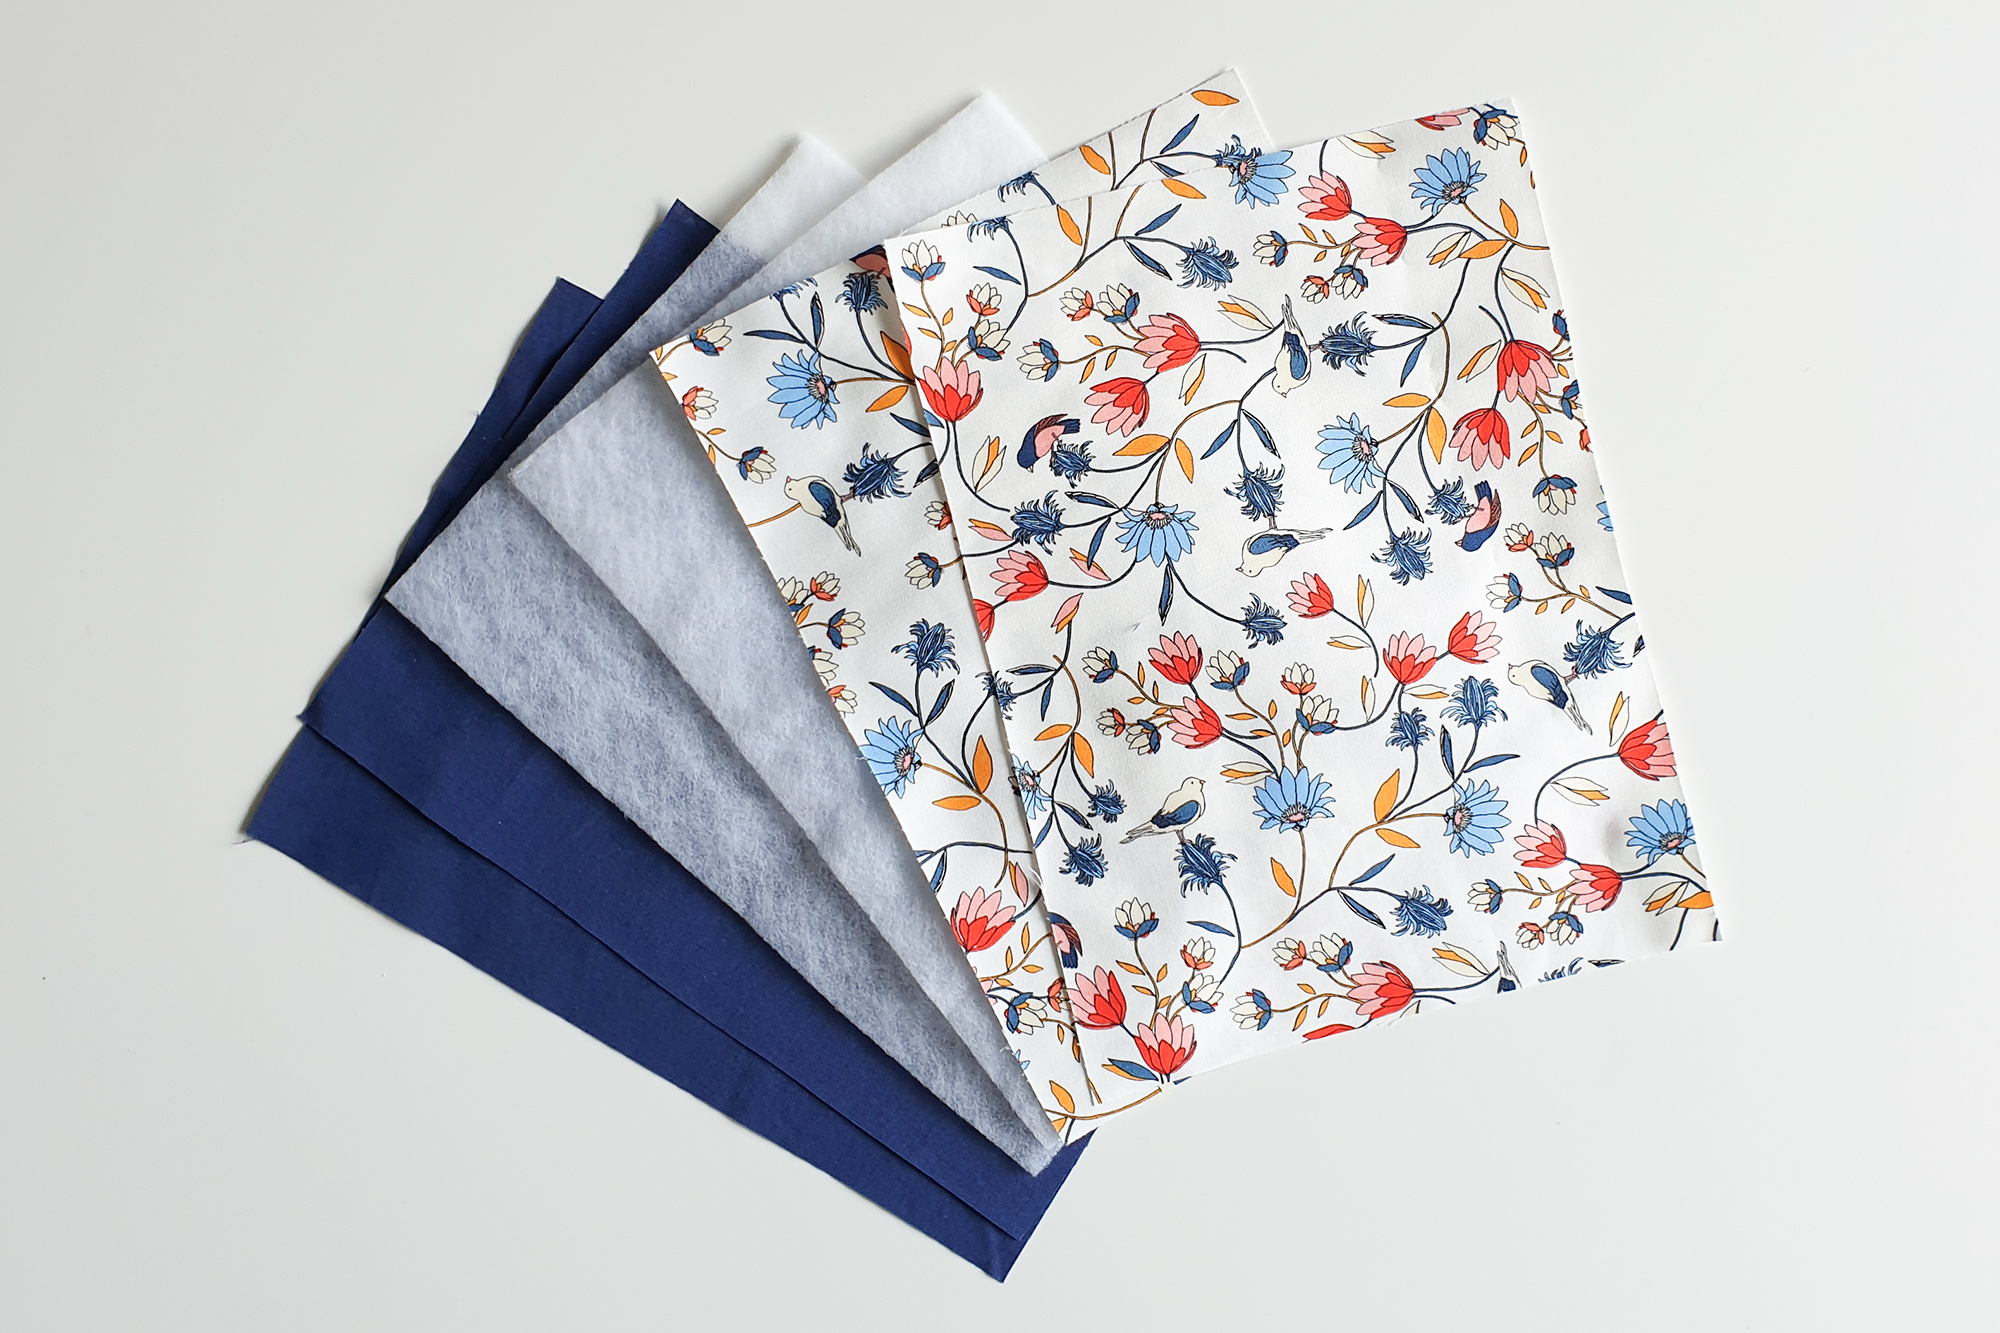
🇺🇸 Materials
- Fabric
preferably non-stretchy cotton - Batting
preferable thich batting that you can iron onto the fabric - Thread
matching the color of the fabric (…if not, who cares 😉 ) - Clips or needles/pins
to attach the different layers of fabric etc. to each other - A sewing machine
(or a sewing needle and lots of patience 😉 ) - An iron and iron board
to iron the batting onto the fabric and to iron the fabric itself - Scissors
you will need them all the time - Pen or Pencil
- Ruler
🇩🇪 Materialien
- Stoff
am besten aus Baumwolle - Volumenvlies
am besten zum Aufbügeln - Nähgarn
wenn es geht, farblich passend zum Stoff (wenn nicht – wenn interessiert’s 😉 ) - Clips oder Stecknadeln
um die verschiedenen Teile aneinander zu befestigen - Eine Nähmaschine
(oder eine Nähnadel und ganz viel Geduld 😉 ) - Ein Bügeleisen und Bügelbrett
um das Volumenvlies aufzubügeln und den Stoff zu bügeln - Schere
eine Schere braucht man einfach immer - Stift
- Lineal
Instructions / Anleitung
🇺🇸 A few general hints that I will not mention in every step of these instructions:
Always make sure that you sew up the ends well or your seam might get lose. Also, always cut off the thread after you finished sewing. And finally, follow the instructions of your sewing machine – every machine is different, so I can’t explain in this tutorial how you have to use yours.
🇩🇪 Ein paar generelle Tipps vorab, die ich in der Anleitung nicht ständig wiederholen werde:
Vernähe jede Naht am Anfang und Ende, ansonsten kann sie sich schnell wieder lösen. Schneide den Faden nach jeder Naht vorne und hinten ab. Und zu guter Letzt, befolge die Anleitung deiner Nähmaschine. Jede Nähmaschine ist ein bisschen anders, sodass ich hier nicht erklären kann, wie genau deine funktioniert.
🇺🇸 Step 1: Cut your fabric and batting into the right size
You will need two pieces of fabric for the outside of the book sleeve, two pieces of fabric for the inside of the book sleeve and two pieces of batting.
A good size (from my experience) is ~11,4 inches (29cm) x 8,3 inches (21cm). You can of course adjust the measurements to your liking.
🇩🇪 Schritt 1: Schneide den Stoff und das Volumenvlies zu
Du benötigst zwei Lagen Stoff für die Außenseite der Buchhülle, zwei für die Innenseite und zwei Lagen Volumenvlies.
Die Größe 29cm x 21cm hat sich bei mir gut bewährt – je nachdem, wie groß eure Hülle sein soll, könnt ihr die Maße einfach anpassen. Denkt daran, dass die Hülle kleiner wird, da durch die Nahtzugabe einiges verloren geht.
🇺🇸 Step 2: Iron the inner fabric onto the batting
Place the inner fabric onto the batting. Make sure that the side of the fabric that you do not want to see is laying on the side with the tiny glue dots. Iron the fabric onto the batting (so that the iron is touching the fabric, not the batting; or the batting might start to melt!) Follow the instructions of your batting on how long to iron each place so that the glue melts and sticks onto the fabric. The instructions for my batting say 15 sec. Don’t burn your fabric!
🇩🇪 Schritt 2: Vlies aufbügeln
Nimm dir die Stoffteile für die Innenseiten deiner Buchhülle und platziere sie so auf den Volumenvlies, dass die „unschöne“ Seite des Stoffs und die Seite mit den Klebepunkten des Volumenvlies sich berühren. Bügel das Vlies auf, aber beachte dabei, dass du auf der Seite des Stoffs bügelst, nicht des Vlies! Das Vlies besteht normalerweise aus Kunststoff und könnte schmelzen. Befolge dabei die Angaben deines Bügelvlies; meins muss man z.B. an jeder Stelle 15 Sekunden bügeln, damit die Klebepunkte schmelzen und so mit dem Stoff verbinden. Teste aber lieber vorher, was dein Stoff aushält, schließlich wollen wir verbrannte Stellen vermeiden.


🇺🇸 Step 3: Sew the inner pieces together
The first thing we will sew is the inner piece of the book sleeve. Place the two layers of fabric (with the batting) on top of each other. The batting needs to be on the top and the bottom; the two fabric sides touch each other. Sew the Fabric together in a „U“-shape, leaving on of the smaller sides open.

🇩🇪 Schritt 3: Innenseiten zusammennähen
Als erstes nähen wir den inneren Teil der Buchhülle. Platziere hierfür die beiden Stoffe (mit dem aufgebügelten Volumenvlies) aufeinander, sodass das Volumenvlies außen ist. Die beiden Stoffseiten sollen einander berühren. Nähe dann in „U“ Form an den Außenkanten entlang, sodass nur noch eine der kurzen Seiten offen bleibt.

🇺🇸 Step 4: Sew the outer pieces together
Now put the inner fabric piece aside and repeat the same step with the outer fabric pieces. Make sure they are well-ironed before you begin to sew. In this step, the nice sides of the fabric shall touch each other. Again, only sew three sides of the fabric („U“-shape) and leave one of the smaller sides open.
🇩🇪 Schritt 4: Außenseiten zusammennähen
Wiederhole das Ganze für die Außenseiten. Nimm dir die beiden verbliebenen Stücke Stoff, lege die schönen Seiten aufeinander und nähe dann in „U“-Form einmal um die drei Kanten. Stelle sicher, dass der Stoff gut gebügelt ist, bevor du anfängst zu nähen.

🇺🇸 Step 5: Turn the outer piece inside-out
Now take the outer piece that you just sew together and turn it inside-out. Carefully use your scissors to push into the corners from the inside. When you are done, you will see the nice fabric and it will look more like a book sleeve than before ;). ONLY do this with the outer piece. The inner piece needs to stay as it is!
🇩🇪 Schritt 5: Außenteil umkrempeln
Als nächstes darfst du das äußere Teil deiner Buchhülle auf links drehen, sodass man die schöne Seite des Stoffs sieht. Nun sieht das Ganze doch schon viel mehr aus wie eine Buchhülle. Falls du nicht gut in die Ecken kommst, nimm vorsichtig eine Schere zur Hilfe. Mach das aber NUR mit dem Außenteil! Das Innenstück bleibt, wie es ist.
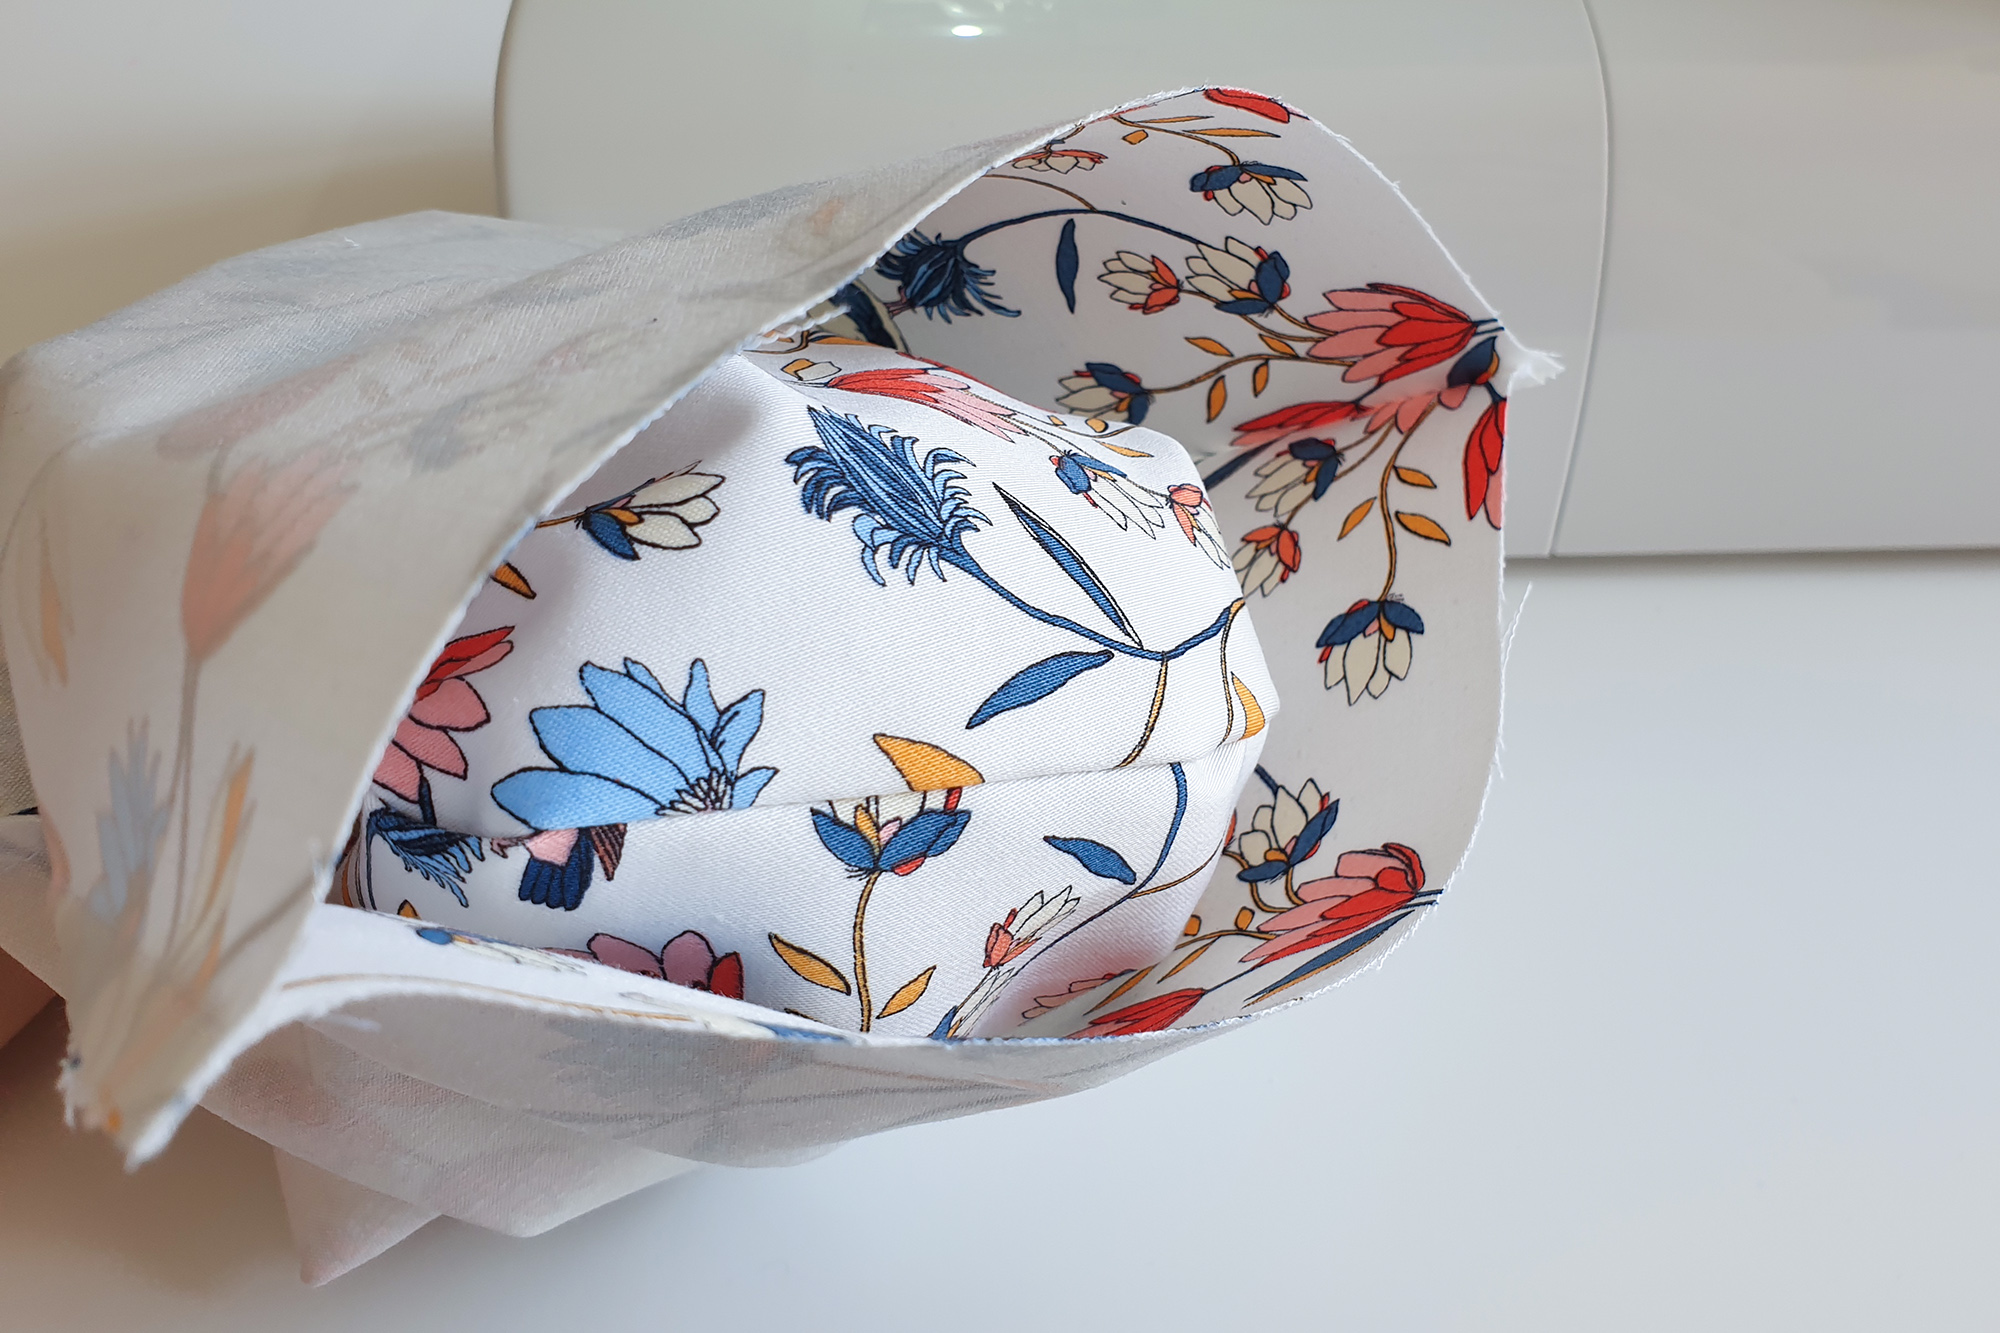

🇺🇸 Step 6: Place the inner piece into the outer piece
Now slide the inner piece into the outer piece. Make sure the corners and seams are aligned. In this and the next step, precision is important! If you are lazy now, you’ll regret it when you start sewing. 😉
🇩🇪 Schritt 6: Das innere Teil in das äußere stecken
Schiebe nun das innere Teil in das äußere. Achte darauf, dass die Ecken gut ineinander sitzen und die Nähte genau aufeinander liegen. Nimm dir für diesen und den nächsten Schritt Zeit, denn was nicht gut sitzt, kann man auch nicht gut zusammennähen.

🇺🇸 Step 7: Fold the edges
This is the trickiest step of the whole book sleeve, so take your time.
Fold the edges of the outer fabric to the inside (~ half an inch). Then fold the edges of the inner fabric to the outside (between the inner and outer fabric). Make sure the edges and seams are well aligned. Secure your folded edges with slips or needles.
🇩🇪 Schritt 7: Die Kanten umfalten
Jetzt kommen wir zum schwierigsten Teil, also nimm dir ruhig Zeit.
Falte die Kanten des äußeren Stoffs etwa 1,5-2cm nach innen. Falte dann die Kanten des inneren Stoffs nach außen. Die gefalteten Kanten sollten also zwischen den Stoffen auseinanderliegen. Kontrolliere, dass die Kanten und Nähte gerade aufeinandersitzen und befestige alles mit Clips oder Stecknadeln, damit es nicht wegrutscht.


🇺🇸 Step 8: Sew around the edges
You’ve already reached the last step: Sewing around the edges! If you have secured everything well, this is not too tricky. With most sewing machines, you can remove the little box in the front that holds the accessories. Please do so if you can. Then sew around the edges that you have just folded and remove the clips or needles as you go.
🇩🇪 Schritt 8: Einmal um die Kante nähen
Jetzt kommen wir auch schon zum letzten Schritt: Einmal um die Kante nähen! Wenn du alles gut festgesteckt hast, geht das recht einfach. Bei den meisten Nähmaschinen kann man ganz einfach vorne die kleine Box, in der sich die Zubehörteile befinden, entfernen. Mach das bitte, wenn es geht, und nähe dann einmal um die Kante. Die Nadeln und Clips kannst du nach und nach entfernen.

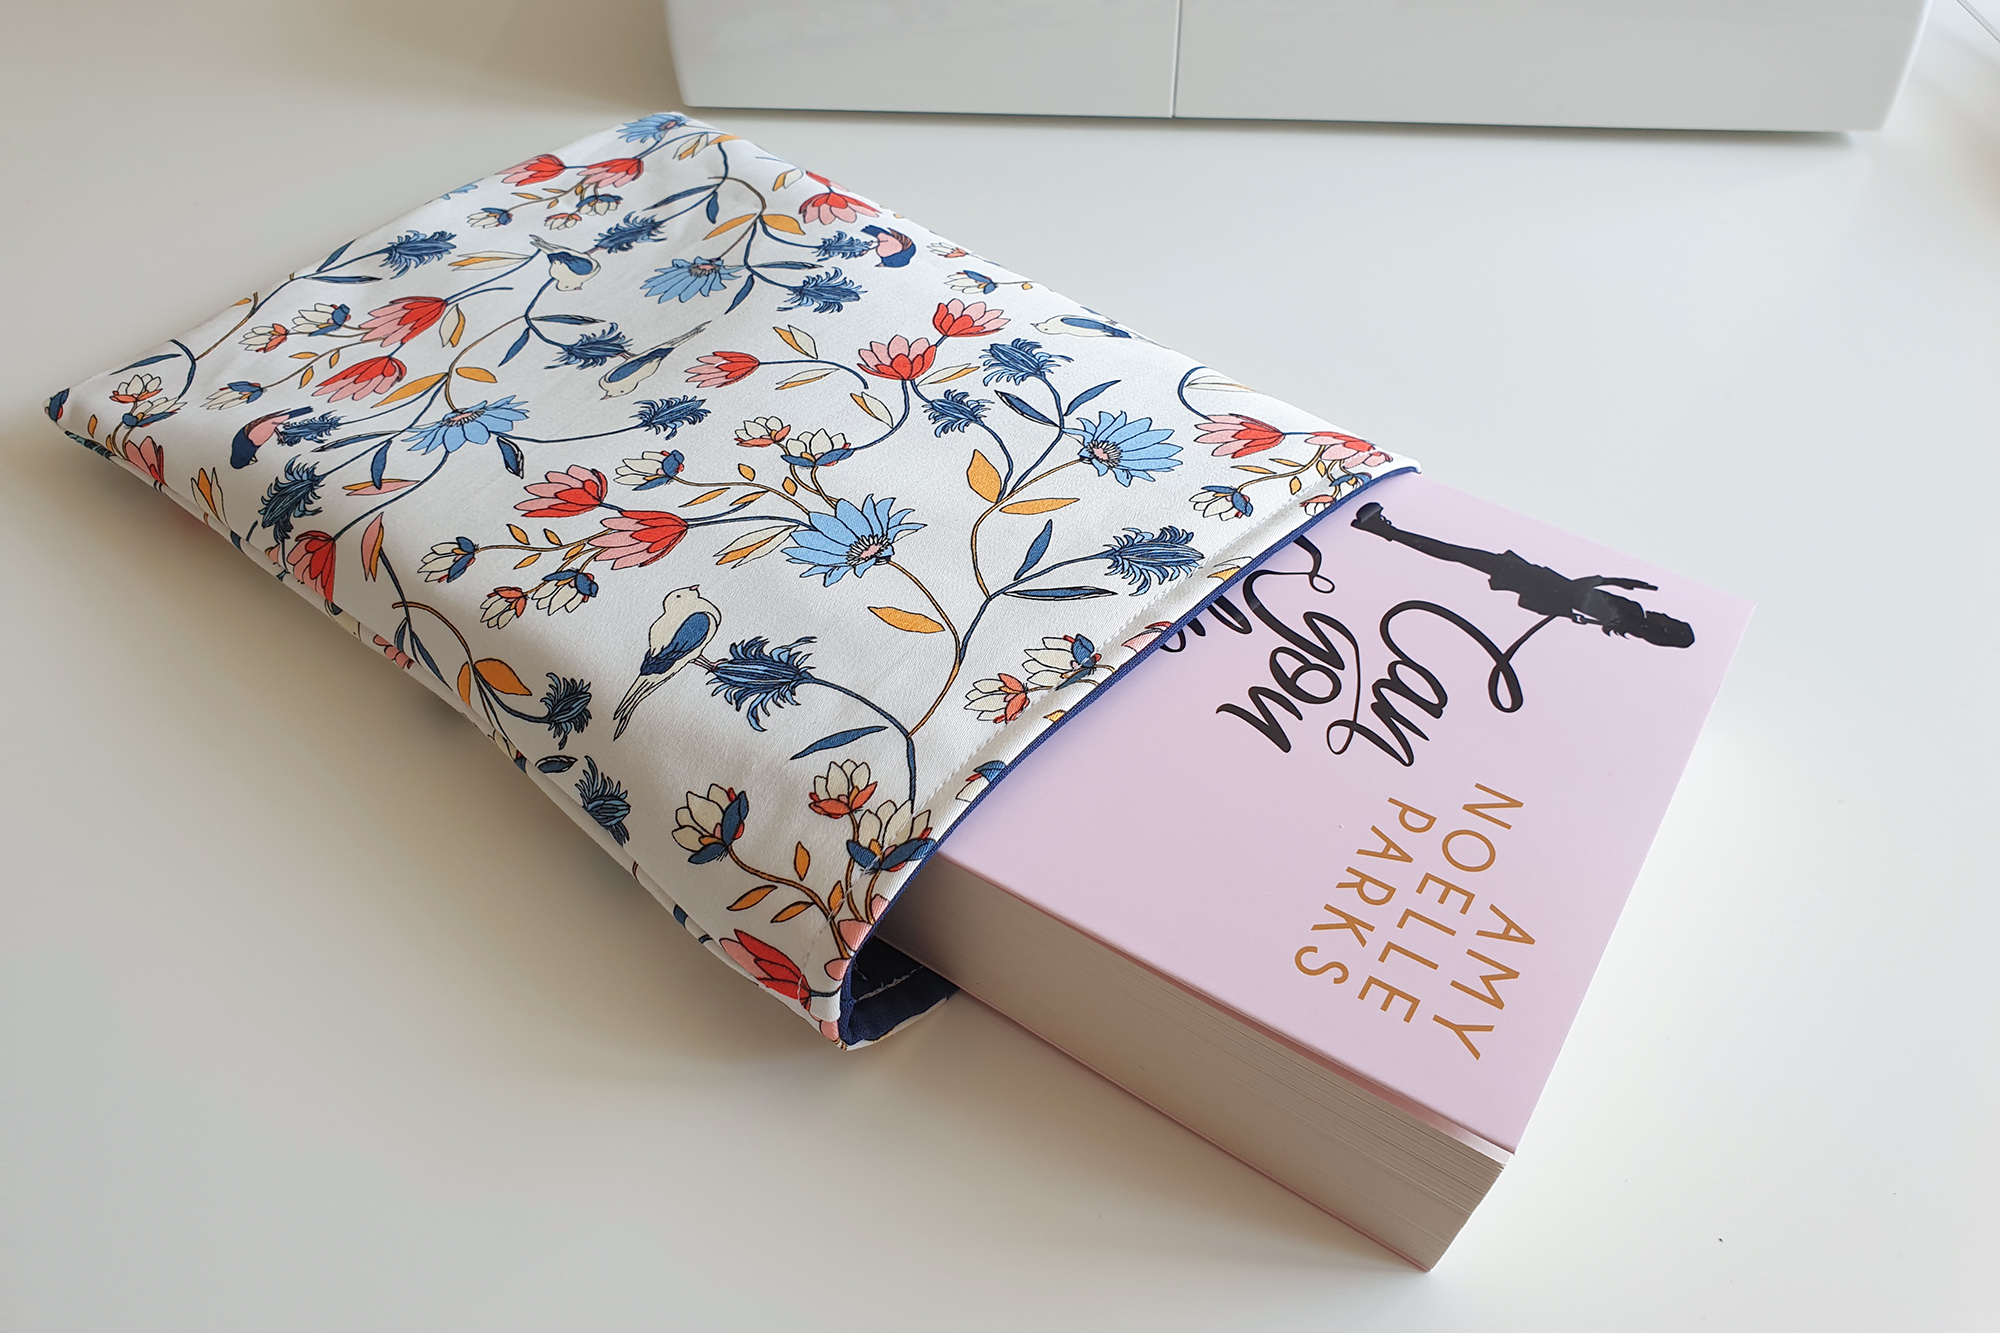
🇺🇸 Congratulations, you’re done!
Great job! If you have any questions, feel free to reach out to me. I’ll try to help as much as I can.
If your first project doesn’t look as neat as you wanted it to be, don’t give up; it’s normal! 😉
🇩🇪 Herzlichen Glückwunsch, du hast es geschafft!
Gute Arbeit! Falls du noch Fragen hast, schreib mir einfach eine E-Mail und ich werde mein Bestes tun, um dir zu helfen.
Falls dein erstes Projekt nicht so gut geworden ist, wie du es dir erhofft hast, gib nicht auf! Das ist normal. 😉
2 comments
Sieht super aus und eine tolle Anleitung zum nach machen!
LG
Anette
Awesome!! I plan to make a few this weekend!!